


Construction site safety inspections: the 2026 guide for construction teams
Master construction site safety inspections with checklists, workflows, and digital tools. Turn paper forms into controlled apps with audit trails.

TL;DR
- Construction site safety inspections identify potential hazards before they cause incidents. Daily walk-throughs catch immediate risks (unsecured ladders, missing guardrails), while weekly and monthly audits track compliance trends and verify corrective actions across every site, supporting stronger overall safety performance.
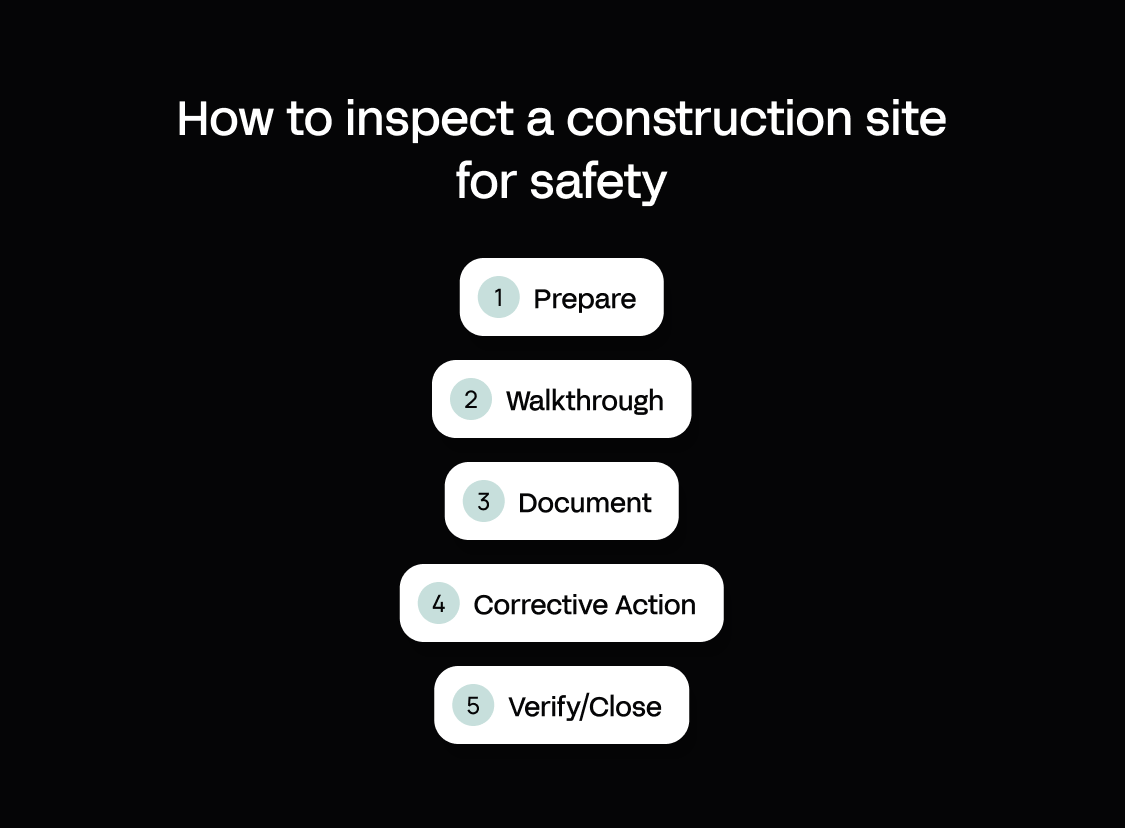
- Effective inspections follow a structured workflow: prepare with the right checklist for the day's activities, walk the site by hazard category (fall protection, electrical, excavation, housekeeping), document findings with photos and severity ratings, assign corrective actions, and verify fixes before close-out.
- Paper-based inspections create dangerous delays. Findings sit on clipboards for hours or days before reaching site management or anyone else who can act. Trends across sites stay invisible until an incident forces attention, and compliance evidence is scattered when HSE (Health and Safety Executive) audits or investigations demand it.
- Digital inspection apps turn findings into instant action: mobile capture with photos and mandatory fields, digital checklists that replace paper forms, routing of high-severity issues to project managers and QHSE (quality, health, safety, and environment) leads, dashboards built on real-time data that expose risk patterns across every site, and a complete record that proves due diligence.
Every site in the construction industry runs safety inspections in some form. Site managers walk the site every morning, QHSE teams run weekly audits, and contractors tick boxes on laminated checklists. Yet findings are still slow to reach anyone who can act, trends across sites stay hidden in filing cabinets, and the evidence trail is thin exactly when an HSE investigation or insurance claim demands proof of due diligence.
The core problem is simple: construction site inspections still depend on paper forms and a clipboard, so the gap between "hazard identified" and "hazard fixed" is measured in hours or days, not minutes. A supervisor spots an unsecured ladder at 7:00 AM, writes it on a form, and hands it to site management at lunch; the project manager only sees it when they return from a client meeting at 4:00 PM. By then, the ladder had been climbed a dozen times.
This guide shows you how to inspect a construction site for safety in a way that actually prevents incidents. You will learn what to inspect, how often, how documentation fits into the wider construction process, and how to move from paper chaos and inconsistent safety procedures to governed digital inspection apps.
What is a construction site safety inspection?
A construction site safety inspection is a systematic walk-through of an active construction site to identify potential hazards, verify compliance with safety standards and health and safety regulations, and document corrective actions before risks lead to incidents, injuries, or enforcement action.
Inspection types differ by cadence and scope:
- Daily pre-start inspections are quick walk-throughs by site supervisors or lead hands before crews begin work. They focus on immediate hazards tied to the day's activities: scaffolds, ladders, excavations, housekeeping, and the availability of PPE (personal protective equipment). These typically take 15 to 30 minutes and are documented on a short checklist or mobile form.
- Weekly safety inspections are more comprehensive audits by site managers or QHSE coordinators. They cover all active work areas, verify that corrective actions from daily inspections are closed, and check compliance with site-specific safety protocols and method statements. These typically take 1 to 2 hours and are documented in a formal inspection report.
- Monthly safety audits are deep-dive reviews by QHSE teams or external consultants, often tied to project milestones or regulatory reporting cycles. They assess overall safety culture, training programs, incident trends, and systemic issues across multiple sites. These typically take half a day and are documented in audit reports with action plans.
Inspections and audits serve different purposes. Inspections are operational and forward-looking: find and fix hazards now. Audits are evaluative and backward-looking: a systematic evaluation of whether the safety management system is working. Both are necessary, and together they drive continuous improvement across construction operations. This guide focuses on inspections.
The goal of every inspection is the same: identify hazards before they cause harm and address potential issues while they are still cheap to fix. What you inspect and how often depends on the work happening on site.
Why construction site safety inspections matter: compliance, cost, and lives
Regulatory compliance and enforcement risk
In the UK, the Construction (Design and Management) Regulations 2015 (CDM 2015) place explicit duties on principal contractors to monitor and coordinate construction health and safety arrangements across every project. The Health and Safety at Work Act 1974 (HSWA 1974) requires employers to ensure, so far as reasonably practicable, the health and safety of workers and others affected by the work, and both instruments set the industry standards inspections are measured against.
Regular audits and inspections are the primary evidence that you are meeting these duties. Health and Safety Executive (HSE) inspectors expect to see documented inspection records, corrective action logs, and evidence of follow-up when they visit a site or investigate an incident. Missing or incomplete records can trigger improvement notices, prohibition notices, potential fines, or prosecution.
Operational cost of incidents
A fall from height that results in a serious injury can cost a mid-market contractor £50,000 to £150,000 or more in direct costs (HSE fines, legal fees, medical expenses, insurance excess, lost-time wages) and indirect costs (project delays, reputational damage, increased insurance premiums, management time spent on investigations and court proceedings). Early hazard identification through daily inspections avoids the incident entirely, and the cost savings compound: the ROI of a 20-minute daily inspection is measured in prevented incidents, not just compliance ticks.
Moral and cultural stakes
Every worker on site goes home safe. That is the non-negotiable standard. Inspections are the operational expression of that commitment: you walk the site, you spot the hazard, and you fix it before someone gets hurt.
When inspections become routine and findings are acted on quickly, safety culture shifts from reactive (incident, then investigation, then corrective action) to proactive (hazard, then inspection, then fix). That shift in practices, more than any single policy, is what separates high-performing contractors from those who treat safety as a compliance exercise – and it is the clearest measure of a safety program's effectiveness.
Understanding why inspections matter is the foundation. Knowing what to inspect and how to document it is where most teams struggle.
What to inspect: construction site hazards by category
This section is the operational core of the guide: a field-ready, category-by-category breakdown of the critical areas to check during a construction site safety inspection.
Fall protection and working at height
Falls from height remain the leading cause of fatal injuries in UK construction according to HSE statistics. Run these safety checks:
- Edge protection: Guardrails at least 950 mm high (Work at Height Regulations 2005) with mid-rails and toe boards on all open edges, platforms, and floor openings. Check for gaps, damage, or temporary removal without barriers.
- Scaffolds: Tags showing last inspection date (every 7 days or after adverse weather), base plates on firm ground, ties to the structure, safe access (ladder or stair tower), and no overloading of platforms.
- Ladders: Secured at top and bottom, correct angle (1:4 ratio), extending at least 1 m above landing point, no damaged rungs, and used only for access (not as a working platform).
- Roof work: Edge protection, safety nets, or personal fall arrest systems in place before work begins. Fragile roof warnings and barriers around skylights and roof lights.
- Mobile elevating work platforms (MEWPs): Daily pre-use checks logged, operators trained and certified, guardrails in place, and no use on soft or sloping ground without stabilisers.
A fall from 2 metres can be fatal. Every open edge, every scaffold, every ladder is a potential fall hazard until it is inspected and verified safe.
Excavations and trenching
Trench collapses kill quickly. Inspect:
- Shoring and support: A competent person must assess every excavation. HSE guidance states that no ground can be relied upon to stand unsupported, and CDM 2015 Regulation 22 requires all practicable steps to prevent collapse. While 1.2 m is often used as a rule of thumb, even shallower trenches can be dangerous. Trench boxes, hydraulic shores, or timber shoring should be installed as necessary. Check for signs of movement, water ingress, or soil cracking.
- Edge protection and barriers: Keep vehicles away from excavation edges using baulks or barriers, and use stop blocks where vehicles tip into excavations. Keep spoil and plant back from the sides to avoid surcharge loading. Provide substantial barriers where people could fall in, with signage warning of excavation hazards. See HSE guidance on excavations for details.
- Access and egress: Provide a safe means of getting into and out of the excavation. Where ladders are used, they must be on a firm, level base, secured to prevent slipping, and extend above the landing place. See HSE guidance on excavations.
- Atmosphere testing: If the excavation is deep or confined, test for oxygen levels, toxic gases, and flammable atmospheres before entry and continuously during work.
- Spoil and materials: Stored at least 1 m back from excavation edges to prevent surcharge loading and collapse.
Soil can weigh 1.5 to 2 tonnes per cubic metre. A trench collapse buries workers in seconds, and rescue is often too late.
Electrical hazards and temporary power
Electrocution and electrical fires are preventable with proper inspection. Verify:
- Portable tools and equipment: 110V reduced-voltage tools on site (not 240V mains unless via an RCD (residual current device)). Visual check for damaged cables, plugs, and casings before use.
- RCDs: 30 mA RCDs on all socket outlets and extension leads. Test RCD trip function daily using the test button.
- Overhead and underground services: Service plans displayed, services marked on site, safe working distances maintained (overhead power lines, buried cables), and permit-to-dig systems in place.
- Temporary lighting and distribution boards: Weatherproof enclosures, no overloading of circuits, cables routed to avoid damage from vehicles and plant.
240V mains electricity can kill in a fraction of a second. Reduced voltage and RCD protection are the primary defences.
Housekeeping and site organization
Poor housekeeping is a leading indicator of wider safety failures. Check:
- Access routes and walkways: Clear of materials, debris, and trip hazards. Adequate width (minimum 1 m). Level and firm surfaces.
- Material storage: Stacked safely (no leaning piles), secured against toppling, and stored away from edges and excavations.
- Waste and debris: Skips and waste bins provided and used. No accumulation of combustible waste near hot works or electrical equipment.
- Environmental controls: Waste segregated and disposed of in line with environmental regulations; spill kits available near fuel storage and refuelling points; dust and noise controlled per site permit conditions.
- Signage and barriers: Hazard warnings, directional signs, and barriers in place and visible. No faded, damaged, or missing signs.
Slips, trips, and falls on the level are the most common cause of lost-time injuries. A tidy site is a safer site.
PPE (personal protective equipment) and welfare
PPE is the last line of defence, but only if it is available, suitable, and used. Confirm:
- Hard hats, high-vis, and safety boots: Worn by everyone on site (including visitors). Check for damage (cracked hard hats, torn high-vis).
- Respiratory protection: Dust masks or respirators provided and worn where required (cutting, grinding, working with silica or hazardous substances). Fit-tested and face-seal checked.
- Hearing protection: Provided in high-noise areas (85 dB and above). Signage indicating hearing protection zones.
- Welfare facilities: Clean toilets, washing facilities with hot water, drinking water, and a heated rest area. Facilities maintained and stocked.
PPE protects workers only if it is worn and fit for purpose. Welfare facilities are a legal requirement and a basic dignity issue.
Plant, vehicles, and mobile equipment
Vehicles and plant are involved in a significant proportion of construction fatalities (struck-by incidents, rollovers). Inspect:
- Pre-use checks: Operators completing and signing daily checks (brakes, lights, reversing alarms, seatbelts, fire extinguishers).
- Segregation of vehicles and pedestrians: Barriers, marked walkways, and exclusion zones around plant operations. Banksmen used where visibility is limited.
- Lifting operations: Lifting equipment must be thoroughly examined on schedule under LOLER 1998 (Lifting Operations and Lifting Equipment Regulations 1998) Regulation 9: cranes, telehandlers, and goods hoists at least every 12 months; equipment that lifts people and lifting accessories (slings, chains) every 6 months. A competent-person examination scheme can vary these intervals. Equipment must be checked before each lift, with lift plans in place for complex lifts. See HSE INDG422 for guidance.
- Refuelling and maintenance: Engines off, no smoking, spill kits available. Maintenance carried out in designated areas away from live work.
A loaded dumper or excavator can weigh 10 tonnes or more. Struck-by incidents are often fatal.
How often should you inspect? Daily, weekly, and monthly cadences
Inspection frequency works as a layered system, not a one-size-fits-all rule: the right cadence should adapt to the phase of the construction project and follow from a risk assessment of the site, not a generic template.
Daily pre-start inspections (15 to 30 minutes)
Who: Site supervisor, lead hand, or appointed competent person.
When: Before work begins each day, or before each shift on multi-shift sites.
What: Focus on immediate hazards tied to the day's activities: the scaffolds being used today, the excavation being worked in today, the tools and plant being operated today. Use a short checklist (10 to 15 items) tailored to the work planned. Document findings using digital checklists on a mobile device, or on paper where digital tools are not yet in place. High-severity issues (missing guardrails, damaged scaffold, unsafe excavation) must be fixed before work starts.
Why this cadence: Conditions change daily. Weather, new work activities, different trades on site. A scaffold that was safe yesterday may have been modified overnight. Daily inspections catch these changes before they cause incidents.
Weekly safety inspections (1 to 2 hours)
Who: Site manager, QHSE coordinator, or senior supervisor.
When: Same day each week (for example, every Monday morning) to establish routine.
What: Comprehensive walk-through of all active work areas, covering all hazard categories (fall protection, excavations, electrical, housekeeping, PPE, plant). Verify that corrective actions from daily inspections are closed. Document findings in a formal inspection report with photos, severity ratings, responsible parties, and due dates, and share the report with relevant stakeholders (site management, subcontractors, and the client where required).
Why this cadence: Weekly inspections provide oversight and accountability. They verify that daily inspections are happening and that findings are being acted on. They also catch systemic issues (repeated housekeeping failures, missing PPE) that daily inspections may miss.
Monthly safety audits (half-day)
Who: QHSE manager, external consultant, or senior leadership team.
When: Tied to project milestones, monthly reporting cycles, or regulatory requirements.
What: A detailed review of safety management systems: training records, incident and near-miss logs, corrective action aging, inspection completion rates, and trends across multiple sites. Assess safety culture through worker interviews and observations. Document findings in an audit report with strategic action plans.
Why this cadence: Monthly audits provide the strategic view. They identify patterns (for example, fall protection issues appearing on multiple sites) and systemic gaps (inadequate training, unclear responsibilities) that site-level inspections cannot see, giving leadership group-wide visibility into safety performance.
Final inspections at practical completion
Who: Principal contractor, client representative, and building control or an approved inspector.
When: At practical completion, before handover, and again for any snagging or defects-period sign-off.
What: Final inspections verify that the completed works, including load-bearing elements and the building's structure, match the approved plans and building regulations before the client takes possession. They also confirm that fire safety systems, means of escape, and any conditions attached to planning consent have been met.
Why this cadence: A final inspection is the last checkpoint before responsibility for the building passes to the client. Catching a discrepancy against the approved plans here is far cheaper than discovering it after handover, when remedial work means reopening finished areas.
Knowing what to inspect and how often is half the battle. Documenting findings and ensuring they are acted on is where paper-based systems break down.
How to document construction site safety inspections (and why paper fails)
Documentation is not optional. It is the evidence that the work undertaken on site meets specified standards, the record that proves due diligence when an incident is investigated, and the data that shows you where risks are concentrating across sites.
What effective inspection documentation must include
- Date, time, and location: Which site, which area, which phase of work.
- Inspector name and role: Who conducted the inspection and their competence.
- Checklist or inspection criteria: What was inspected (use the hazard categories above).
- Findings: Hazards identified, with specific location, description, and photographic evidence.
- Severity and priority: Immediate risk (stop work), high priority (fix today), medium (fix this week), low (monitor).
- Corrective actions: What needs to be done, who is responsible, and by when.
- Verification and close-out: Evidence that the corrective action was completed (photo, sign-off, re-inspection).
Why paper-based inspection systems fail
- Findings are slow to reach decision-makers. A supervisor spots a hazard at 7:00 AM, writes it on a clipboard, hands it to the site office at lunch, and the project manager sees it at 4:00 PM. By then, the hazard has been present for 9 hours.
- Trends across sites stay hidden. Each site has its own filing cabinet of inspection forms. No one sees that fall protection issues are appearing on multiple projects until an incident forces a review.
- Evidence is scattered when you need it. Photos are on someone's phone, the checklist is in a filing cabinet, the corrective action log is in an email thread. When HSE investigates an incident or an insurance claim demands proof of due diligence, reconstructing the evidence trail takes days.
- Follow-up is manual and easily missed. Corrective actions are written on a form, and someone has to remember to check whether they were completed. High-priority issues age into weeks because no one is tracking them.
The fix is a digital workflow that captures findings quickly, routes them to the right people, and tracks corrective actions to close-out.
How digital inspection apps solve the paper problem
Digital inspection apps address the workflow failures that paper cannot fix. Here is what they deliver:
- Mobile capture in the field. Inspectors walk the site with a phone or tablet and complete the checklist, attaching photos and notes to each finding. Findings are captured as they happen rather than hours later when a clipboard reaches the office.
- Offline capture. Many sites have no reliable signal – a basement, a remote location, or steel and concrete blocking a connection. Inspectors keep working through the checklist regardless, and the app syncs findings, photos, and corrective actions the moment the device reconnects, so nothing is lost and nothing has to be re-entered.
- Routing and notifications. High-severity findings (missing guardrails, unsafe excavations) can be flagged and routed to project managers, QHSE leads, and site supervisors quickly, reducing manual handoffs.
- Centralised dashboards and cross-site visibility. Inspections, findings, and corrective actions are logged in one system. QHSE managers and operations directors can see risk trends across all sites: which hazard categories recur, which sites have the highest open-action counts, which corrective actions are ageing past due.
- A defensible record for compliance. Inspections, photos, checklists, and corrective-action records stored in one place, ready to produce when HSE inspectors, insurance assessors, or legal teams demand evidence of due diligence.
- Customisable templates and workflows. Daily pre-start checklists, weekly inspection reports, and monthly audit forms built as digital templates tailored to your sites, trades, and activities – the templates construction companies actually need, rather than a generic checklist that does not fit your work.
How Appfarm fits
Most construction teams want an inspection app built around their own templates, their own hazard categories, and their own corrective action processes, rather than an off-the-shelf safety app that forces them into someone else's workflow. But they do not have the time or the team to commission custom development.
Appfarm is an app creation platform that lets you build that inspection app without becoming a software company.
Start with an AI prompt ("build a construction safety inspection app with photo evidence and routing of high-severity findings"), then move to the visual canvas to refine the templates and workflows. This kind of AI-assisted software development is changing how operations teams build internal tools, without needing a dedicated engineering team. Visual development is Appfarm's heritage, and you can move between the AI prompt and the visual canvas freely, so you keep full control of how the app behaves – unlike pure AI code-generation tools built mainly for fast prototyping, where the underlying logic stays opaque. That distinction matters here: an inspection app is also the audit trail an HSE investigation will rely on, so the models behind it need to stay visible and governed, not just fast to generate. Deploy the result as a governed, production-grade PWA (progressive web app, a browser-based application that works on any device) in days rather than months.
Here is the part that matters over the life of the app: your team owns what the app does, and Appfarm as a managed platform owns keeping it running. Appfarm reviews, secures, patches, hosts, and maintains the underlying technology, including uptime and disaster recovery, so the app still works a year from now. Governance and sign-off for a production app sit with the IT team, while QHSE owns the templates and operations captures findings on site. And because nothing surfaces workflow gaps like real use, testing the app in the field with real inspectors is how you catch the UX issues that matter before rollout.
Because Appfarm is fully EU/EEA hosted and ISO 27001 certified, your inspection and incident records stay within the European data-residency and compliance expectations many public-sector and infrastructure clients require of their supply chain.
Construction companies like Skanska have used Appfarm to replace manual workflows and build custom applications around how their operations actually work. In the Spreng project, for example, Skanska built a fully offline-capable app for planning and executing tunnel-blasting operations, letting crews working 7 km underground capture data and follow safety processes without a signal.
If you are ready to move from clipboards to governed digital inspections, explore how construction teams build safety apps with Appfarm for field operations.
(And if you are comparing options more broadly before committing, our breakdowns of the best no-code platforms for enterprises and the best low-code platforms for enterprises are a good next stop.)
Conclusion: from clipboards to governed digital inspections
Construction site safety inspections identify hazards before they cause incidents, but only if findings reach decision-makers quickly and trends are visible across sites. Paper-based workflows create dangerous delays: findings sit on clipboards for hours, trends stay hidden in filing cabinets, and compliance evidence is scattered when HSE audits or investigations demand it. Digital inspection apps solve this by capturing findings in the field, routing high-severity issues quickly, and exposing risk patterns across every project in dashboards.
Appfarm lets construction teams build custom safety inspection apps with their own templates, mobile capture, and routing of findings, plus dashboards that expose risk trends across every site. Your team owns what the app does; Appfarm, as a governed, EU-hosted managed platform, keeps it running.
See how construction teams build safety apps with Appfarm.
FAQs about safety inspections on construction sites
What are the 5 types of safety signs in construction?
The five types of safety signs in UK construction are: (1) Prohibition signs (red circle with a diagonal line, such as "No smoking" or "No entry"), (2) Warning signs (yellow triangle with black border, such as "Caution: Slippery surface" or "Warning: Overhead cables"), (3) Mandatory signs (blue circle, such as "Wear hard hat" or "Wear safety boots"), (4) Safe condition signs (green rectangle, such as "First aid" or "Emergency exit"), and (5) Fire equipment signs (red rectangle, such as "Fire extinguisher" or "Fire alarm call point"). These signs must comply with the Health and Safety (Safety Signs and Signals) Regulations 1996.
What is the 20-20-20 rule in construction safety?
The 20-20-20 rule is a guideline for reducing eye strain and fatigue when using screens or doing close-up work on construction sites (for example, reading plans or using tablets for inspections). Every 20 minutes, take a 20-second break and look at something 20 feet (approximately 6 metres) away. While primarily an office ergonomics rule, it is increasingly relevant on construction sites as digital tools (tablets, mobile inspection apps) become standard.
Does OSHA inspect construction sites?
OSHA (the Occupational Safety and Health Administration) is the US regulatory body and does not have jurisdiction in the UK. In the UK, construction sites are inspected by the Health and Safety Executive (HSE), which enforces the Health and Safety at Work Act 1974 and the Construction (Design and Management) Regulations 2015 (CDM 2015). HSE inspectors can visit sites unannounced, issue improvement or prohibition notices, and prosecute for serious breaches. Regular internal safety inspections (daily, weekly, monthly) help ensure compliance and reduce the risk of enforcement action.
What is checked during a site inspection?
A comprehensive construction site safety inspection covers several aspects: (1) Fall protection (guardrails, scaffolds, ladders, edge protection, roof work safety measures), (2) Excavations (shoring, barriers, access, spoil placement), (3) Electrical hazards (RCDs, reduced-voltage tools, safe working distances from services), (4) Housekeeping (clear walkways, safe material storage, waste management), (5) PPE (hard hats, high-vis, safety boots, respiratory and hearing protection), (6) Plant and vehicles (pre-use checks, segregation from pedestrians, lifting operations), and (7) Welfare facilities (toilets, washing facilities, drinking water, rest areas). The specific focus depends on the day's activities and the inspection cadence (daily, weekly, or monthly).
How do you document construction safety inspection findings?
Effective documentation includes: the date, time, and location of the inspection; the inspector's name and role; the checklist or criteria used; specific findings with descriptions, locations, and photos; severity ratings (immediate risk, high, medium, low); corrective actions with responsible parties and due dates; and verification evidence (photos, sign-offs, re-inspection records) when actions are completed. Digital inspection apps streamline this process by capturing findings on mobile devices, routing high-severity issues to decision-makers, and storing all records in a centralized, auditable system.
What is the difference between a safety inspection and a safety audit?
A safety inspection is operational and forward-looking: it identifies hazards on site right now and documents corrective actions to fix them before they cause incidents. Inspections are typically conducted daily or weekly by site supervisors or QHSE coordinators. A safety audit is evaluative and backward-looking: it assesses whether the safety management system is working by reviewing records, trends, training, and compliance over a period of time. Audits are typically conducted monthly or quarterly by QHSE managers or external consultants. Both are necessary: inspections prevent incidents, and audits verify that the prevention system is effective.
More reading


There are no items matching your filters. Please try another filter to view results.
We have a lot of helpful resources. Try another filter or reset the filters to find the resource for you.
Digital transformation without disruption